“`markdown
Rugby union, a sport loved by millions around the globe, is a game of strategy, strength, and skill. Central to the dynamics of this sport are the different positions held by the players. Each position is tailored to maximize the player’s strengths and contribute to the team’s overall performance. This comprehensive guide will walk you through the specific roles and responsibilities of each position on the field, starting with the forward pack and working our way through the back line. Whether you’re new to the game or a seasoned fan looking to deepen your understanding, this article will offer valuable insights into the distinct duties and characteristics associated with every rugby position.
Positions in Rugby Union – Section 1: The Forward Pack
The forward pack, often referred to as the “engine room,” is composed of eight players who focus on physical contests for the ball, both in open play and set pieces like scrums and lineouts. These players are generally larger and stronger, tasked with gaining and retaining possession. They are essential in providing the platform from which the backline can operate.
Within the forward pack, there are two main subdivisions: the tight five and the back row. The tight five are generally concentrated on scrummaging and lineout duties, whereas the back row combines physicality with nimbleness to support both offensive and defensive plays. Understanding the specific roles within these subdivisions provides a clearer picture of how forwards contribute to the team’s success.
Section 1.1: The Tight Five
The tight five consists of the two props, the hooker, and the two locks. This unit is the backbone of the scrum, a set-piece where the ball is contested between the forwards of each team. Their primary responsibilities include providing stability in the scrum and winning lineout and maul ball, which are crucial elements in both gaining field position and maintaining possession.
While the tight five may often be associated with brute strength and physicality, there’s also a strategic element to their play. Proper positioning, timing, and technique are essential to effectively contest and secure the ball. These players must also possess a high level of fitness, as they’re often required to execute multiple set-piece plays and maintain the intensity throughout the match.
The positions
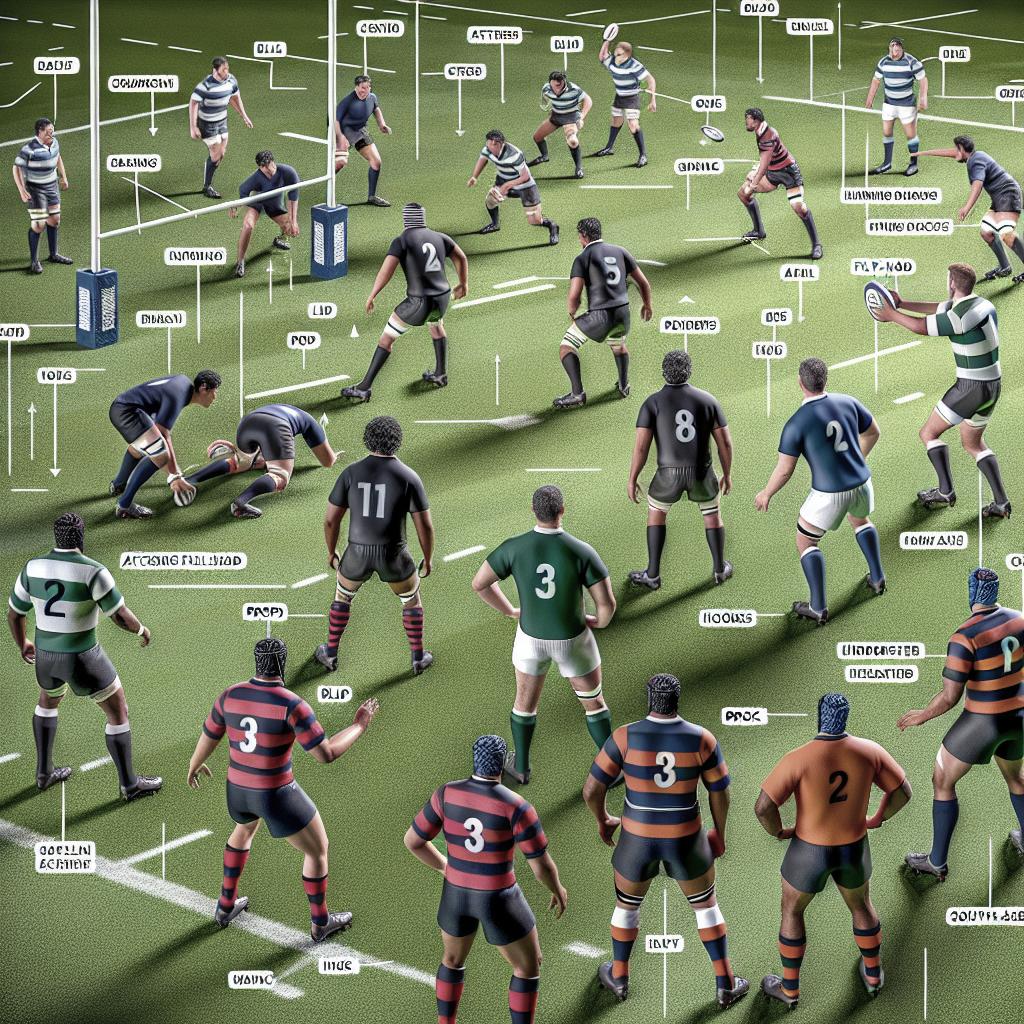
The tight five includes specific positions, each with a unique role: the loosehead and tighthead props (numbers 1 and 3), the hooker (number 2), and the locks or second row (numbers 4 and 5). Together, these players form the cornerstone of the team’s forward power. Each position requires a particular skill set that contributes to the team’s overall effectiveness.
For instance, props are vital in providing stability in the scrum, while the hooker is pivotal in executing accurate lineout throws. The locks bring height and power, essential for winning lineout ball and providing lift support. Understanding these roles is crucial for appreciating the complexity and teamwork involved in rugby union.
A game for all shapes and sizes
One of the unique aspects of rugby is its inclusivity of various body types. The tight five showcases how players of different shapes and sizes can excel. Props are typically more robust and muscular, providing the necessary mass and strength for scrummaging. The hooker, while also requiring strength, needs to be more agile and precise, particularly in lineout throws.
Locks are usually the tallest players on the field, utilizing their height and reach to win lineout ball and contribute to the team’s forward momentum during mauls. This variety in player physique not only makes the game more inclusive but also adds to the complexity and richness of rugby strategy.
Positions by number
In rugby union, positions are assigned specific numbers, which helps in identifying players and their roles. For the tight five, these are numbers 1 through 5. The loosehead prop wears number 1, the hooker number 2, and the tighthead prop number 3. The two locks are numbered 4 and 5. This numbering system not only aids in quick identification but also provides an insight into the player’s responsibilities.
Understanding these numbers and the associated roles can significantly enhance one’s appreciation of the game. Fans and newcomers alike can better follow set pieces like scrums and lineouts, noting the specialized skills and teamwork required in these pivotal moments of play.
Loosehead and Tighthead Prop (Numbers 1 & 3): The Anchors of the Scrum
The loosehead prop (number 1) and tighthead prop (number 3) are integral to the scrum, providing stability, strength, and support to the front row. Their role is to anchor the sides of the scrum, engaging directly with their opposite numbers from the opposing team. This highly physical contest requires a combination of brute strength, technique, and synchronized effort to win the scrum and secure the ball.
Beyond their scrummaging duties, props also play a crucial role in open play. They are often involved in carrying the ball into contact, making tackles, and securing rucks. Their physical presence can help generate momentum and create space for the backs, showcasing their versatility and importance to the team.
Hooker (Number 2): Masters of Precision
The hooker, wearing the number 2 jersey, assumes a unique and vital role in the team. As the central figure in the scrum, the hooker’s primary task is to ‘hook’ the ball back towards their teammates using their feet. This position demands a combination of strength, agility, and precise timing to effectively secure possession. In addition to their scrummaging duties, the hooker is responsible for throwing the ball in during lineouts, requiring pinpoint accuracy to find their jumping teammates amid the contest.
Beyond set pieces, the hooker must be an all-rounder, contributing to open play through ball carries, tackling, and ruck work. Their involvement in both offensive and defensive phases makes the hooker a central figure in the team’s performance, highlighting the multifaceted nature of this critical position.
Lock/Second Row (Number 4 & 5): Towers of Strength
The locks, or second rows, wearing numbers 4 and 5, are the team’s primary sources of power and reach. Typically the tallest players on the field, locks are instrumental in winning lineout ball, providing the necessary lift, and contesting the opposition’s throws. Their role in the scrum is equally vital, as they generate the push that drives the scrum forward, working in unison with the front row.
Apart from set pieces, locks are frequently involved in open play, utilizing their size and strength to break tackles, secure rucks, and support ball carriers. Their ability to cover ground and contribute to multiple facets of the game makes them indispensable to the team, embodying the blend of physicality and endurance required in rugby.
Section 1.2: The Back Row
The back row players, encompassing the flankers and the number eight, combine physicality with mobility, playing crucial roles in both attack and defense. Positioned at the back of the scrum, these players are often the first to break from the set piece and engage in open play. Their responsibilities include winning breakdown contests, making tackles, and supporting ball carriers, showcasing their versatility and high work rate.
This section will delve into the specific roles of the flankers, numbered 6 and 7, and the number eight, numbered 8. Each position is pivotal in maintaining the team’s momentum and disrupting the opposition’s play, highlighting the dynamic nature of the back row within the forward pack.
Flanker/Wing Forward (Numbers 6 & 7): Tireless Workhorses
Flankers, wearing numbers 6 and 7, are often regarded as the tireless workhorses of the team. Their primary duties involve contesting the breakdowns, making crucial tackles, and providing support in both defense and attack. The blindside flanker (number 6) typically focuses on more physical play, while the openside flanker (number 7) is often a more dynamic player, specializing in turnover ball and disrupting the opposition’s attacks.
Flankers must possess a unique blend of strength, speed, and endurance to effectively fulfill their roles. Their involvement in almost every phase of play makes them critical to the team’s performance, requiring a high level of fitness and tactical awareness to constantly adapt to the ever-changing dynamics of the game.
Number Eight (Numbers 8): Dynamic and Powerful
The number eight, wearing the jersey number 8, is a dynamic and powerful player, often involved in both attacking and defensive phases. Positioned at the base of the scrum, the number eight’s responsibilities include securing the ball upon its exit from the scrum and acting as a primary ball carrier. Their ability to break tackles and gain ground is crucial in generating forward momentum and setting the platform for the backs.
Beyond their duties in the scrum, the number eight is also pivotal in open play, frequently involved in rucks, mauls, and tackling. Their versatility and physicality make them key contributors to the team’s overall strategy, embodying the blend of brute strength and tactical acumen required for success on the field.
Section 2: The Back Line
The back line in rugby union comprises the players positioned behind the forward pack. These players are generally faster and more agile, focusing on attacking play and exploiting space created by the forwards. The back line is essential in linking the work done by the forwards to scoring tries, representing the tactical and creative heart of the team.
This section will explore the roles of each back line position, from the scrum-half to the full-back. Understanding these roles will provide insight into the strategic and fast-paced nature of back play, highlighting the diverse skill sets required to excel in these positions.
Scrum-Half (Number 9): The General
The scrum-half, wearing the number 9 jersey, is often referred to as the ‘general’ on the field. Positioned at the base of the scrum and rucks, their primary role is to distribute the ball quickly and accurately to the backs. The scrum-half must have exceptional vision, passing skills, and decision-making abilities to effectively direct play and exploit gaps in the opposition’s defense.
In addition to their passing duties, the scrum-half frequently engages in tactical kicking, adds defensive pressure through tackles, and supports the forwards in securing possession at the breakdown. Their ability to read the game and execute precise plays is crucial to the team’s performance, showcasing the blend of physical and mental prowess required in this pivotal role.
Stand-off or Fly-Half (Number 10): The Game Director
The fly-half, or stand-off, wearing the number 10 jersey, is the team’s primary playmaker and game director. Positioned to receive the ball from the scrum-half, the fly-half is responsible for orchestrating the team’s attacking moves. This role demands a high level of tactical awareness, kicking accuracy, and passing precision to set up scoring opportunities and dictate the flow of the game.
In addition to directing play, the fly-half often takes on goal-kicking duties, requiring a reliable and consistent kicking technique. Their ability to read the game, make split-second decisions, and execute creative plays makes them indispensable to the team’s success, emphasizing the strategic nature of this central role.
Centres (Numbers 12 & 13): Dynamic Runners and Strategic Players
The centres, wearing numbers 12 and 13, play a crucial role in linking the forwards and backs, acting as both dynamic runners and strategic players. The inside centre (number 12) typically combines physicality and playmaking ability, often involved in both carrying the ball and offloading to support players. The outside centre (number 13) focuses more on exploiting defensive gaps, utilizing speed and agility to break through the opposition’s line.
Both centre positions require a blend of strength, speed, and tactical understanding to effectively support attacking plays and defend against opposition advances. Their ability to read the game and execute precise movements is essential to the team’s overall strategy, highlighting their importance in both offensive and defensive phases.
Wingers (Numbers 11 & 14): The Finishing Touch
Wingers, wearing numbers 11 and 14, are often the fastest players on the field, responsible for finishing attacking moves and scoring tries. Positioned on the outer edges of the back line, wingers rely on their speed, agility, and ability to evade tackles to exploit any space created by the centres and fly-half. Their primary role is to capitalize on scoring opportunities and provide a cutting edge to the team’s attacking play.
In addition to their offensive duties, wingers must also be solid defenders, capable of making crucial tackles and covering ground quickly to prevent the opposition from exploiting space down the flanks. Their combination of pace and defensive capability makes them vital components in both attacking and defensive strategies.
Full-back (Number 15): The Defensive Sweeper and Attacking Catalyst
The full-back, wearing the number 15 jersey, is the last line of defense and an attacking catalyst. Positioned behind the main line of defense, the full-back’s primary role is to field kicks from the opposition, return these kicks with interest, and provide a solid defense against attacking runs. This position demands a blend of safe handling, strong tackling, and strategic kicking to counter opposition plays.
Offensively, the full-back often joins the back line during attacking phases, utilizing their vision, speed, and passing skills to create and exploit overlaps. Their ability to balance defensive duties with attacking contributions makes them a versatile and crucial player, embodying the dynamic nature of modern rugby.
3 comments
User1: This article really helped me understand the different roles on the rugby field. Thanks!
User2: As a former player, I appreciate the detailed breakdown of each position. Great job!
User3: I’ve always been confused about the roles in rugby. This blog clarified a lot. Cheers!
Leave a comment
Summary of Key Points
| Section | Positions | Key Roles |
|---|---|---|
| The Forward Pack | Tight Five & Back Row | Scrummaging, Lineouts, Ball Carrying, Tackling |
| Tight Five | Loosehead Prop, Tighthead Prop, Hooker, Locks | Stability in Scrum, Precision in Lineouts |
| Back Row | Flanker, Number Eight | Breakdown Contest, Ball Carrying, Tackling |
| The Back Line | Scrum-Half, Fly-Half, Centres, Wingers, Full-back | Distribution, Playmaking, Speed, Defense |
| Scrum-Half | Scrum-Half | Distribution, Tactical Kicking, Defense |
| Fly-Half | Fly-Half | Playmaking, Kicking, Decision-Making |
| Centres | Inside Centre, Outside Centre | Running, Defense, Playmaking |
| Wingers | Left Wing, Right Wing | Speed, Try-Scoring, Defense |
| Full-back | Full-back | Defense, Kicking, Attacking Support |
“`
